Every woman needs to know how to apply cream blush. Cream blush is so in trend right now. It is considered as a better version of powdered blush. It is less messy and the color variation is more vibrant. This type of blush is also considered as more versatile and easier to use.
If you love using cream blush, the application of the blush should be understood. It is no different from applying the good old-fashioned powdered blush. However, there will be some tricks to apply the cream blush properly, whether you are using brush, fingers, or other applicators. Read them and decide which applicator you want to use to apply the cream blush on the cheek.
These are some of the best explanations that you can get about applying cream blush on the cheek. Read these explanations before attempting to apply the blush, especially for the first time, in order to avoid any mistakes while applying. Here are the explanations for you to read and to understand eventually.
How to Apply Cream Blush Using Highlighter Brush
The most common tool to apply blush is a highlighter brush. It is considered versatile, too, as it can be gripped easily and usable to apply not only blush, but also several other types of makeup. Here are the steps on how to apply cream blush using highlighter brush.
- Dab the Brush into Cream Blush
Open the lid of the cream blush. Hold the brush steadily and then dab the tip of the brush into the cream blush. Do not over do this as a few dips of the product can already color the entire cheek with ease.
- Tap the Brush onto the Cheek
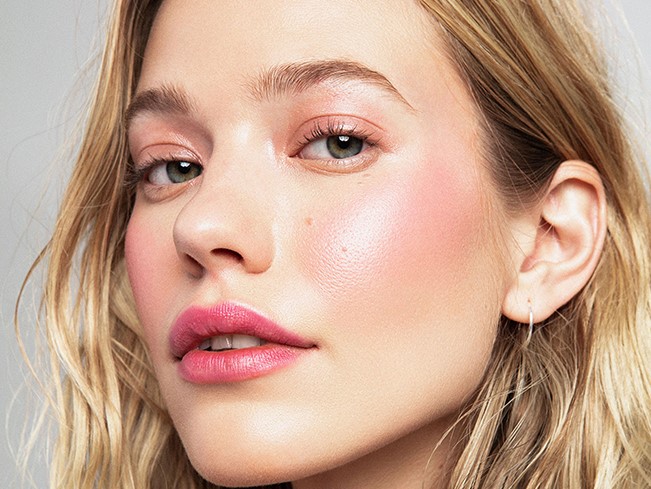
Now apply the brush onto the cheek. It should be applied on the apple of your cheek if you want the best effect. Also, the cheekbone must be applied with blush, too. Do this carefully as not to make the color too apparent.
- Repeat on the Other Cheek
When one cheek is done, move the brush to the other cheek. Dab the brush into the blush container once again and repeat the same process. Make sure both cheeks have the same shades and colors.
Applying the Cream Blush Using Your Fingers
If you do not like using any tools in applying makeup, you do not need to worry about it because you already have the best tools: your fingers. This is the step-by-step tutorial on how to apply cream blush using nothing but your fingers. It is easier and certainly cheaper for sure.
- Wash Your Hands
You do not want to ruin your makeup by applying dirty fingers on your face. This is why you need to wash your hands first before applying anything on the face, including applying the cream blush. Wash it properly and dry it well.
- Dip Your Fingers in the Product
The next thing to do is to dip the tip of your finger into the cream blush container. Make sure it is not too deep so the color won’t be overpowering on the cheek. It is better on this step, too, if you have short fingernails.
- Swipe Your Fingers on the Cheeks
Now, swipe your fingers on the cheek. Use the rest of your fingers to help blending the blush and make it appears as natural as possible. When one cheek is done, wipe your fingers with some damp makeup towel and move to the other cheek.
Using Beauty Blender Sponge
In the recent years, beauty blender sponge started to become a thing. The sponge is in the shape of teardrop and many women believe that the sponge is easier to hold and it has great ability in blending the makeup. Here is how to apply cream blush using this applicator.
- Dip the Sponge in the Cream Blush
There should be two ends of the beauty blender sponge. Take one end and dip it to the cream blush product. Dip it gently not to soak the entire end with the product. Then, you need to wipe out excess cream, if any.
- Swap the Sponge Onto Your Cheeks
Swap the blender onto your cheek. Start by applying it to the edge of the cheekbone down to the end. Make sure that you do not over do this as beauty blender can easily apply the color to the cheek.
- Flip the Sponge and Blend
Flip the beauty blender to its other end. It should be the end with no cream in it. Use it to blender the cream blush as naturally as possible. The cheek should look naturally blushed and not overpowered with colors.
Applying Cream Blush Flat Makeup Sponge
If you like the good old-fashioned flat makeup sponge and you have like a ton of them at home, use them to apply the cream blush. They are totally useful for this goal. This is howto apply cream blush using flat makeup sponge at home. Here they are for you to read.
- Dab the Sponge into Blush
The first thing you want to do here is to dab the sponge. If the sponge is a little bit dry, you can spray some water on the sponge first. Then, when it is more flexible, dab the sponge into the cream blush.
- Apply the Blush on the Cheek
Apply the blush evenly on the cheek. It should be applied on the apple of the cheek and on the cheekbone, too. Do this part carefully so that the color gets distributed evenly around the entire cheek. Make sure the color won’t be too reddish, though.
- Blend the Blush
Well, after the blush is applied on the cheek and swiped on the cheekbone, blend the blush well by using other part of the sponge. Blend until there is no thick color to appear on the cheek. The cheek should look naturally blushed. This is basically the last step on how to apply cream blush using the sponge.


Recent Comments